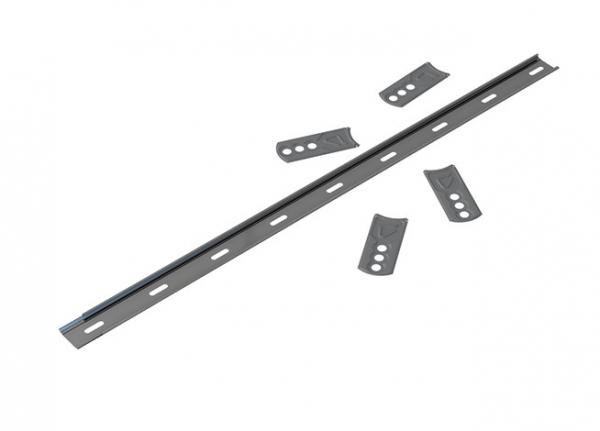
Stainless Steel Wall Starters (Packs of 2no lengths x 1.2m + fixings)

V63 UNIVERSAL STAINLESS STEEL WALL STARTER SYSTEM
The Vista Stainless Steel Wall Starter System joins new walls to existing masonry. Suitable for both internal and external brick or block walls from 60 to 250mm thick, the connectors can be slotted together up to a maximum of 8 metres or 3 storeys high.
2.4m length (made up of 2 x 1.2m lengths)
PACK CONTENTS
The pack contains the fixings necessary for a single leaf wall up to 2.4m / 8’
2 x Wall connectors 1.2m long, stainless steel
5 x Plugs, coach screws and washers
10 x Wall connector ties, stainless steel
Packed in boxes of 10.
Application – Used where new walls are being built directly from existing masonry. Suitable for both internal and external brick or block walls, in buildings up to a maximum of 8 metres or 3 storeys high.
Design – Cannel and tie system. Designed so that multiple channels can be slotted together and so that ties can be placed at variable heights to accommodate different brick and block sizes.
Material – Manufactured from grade 304 stainless steel
Behaviour in relation to fire – non combustable (as defined in the national Building Regulations)
Durability – excellent corrosion resistance and a service life of not less than 60 years
Thermal performance – In situations where thermal losses through ties need to be taken into account, the products will adequately resist thermal transmittance through a wall cavity
INSTALLATION GUIDE
Installation Note
Prior to installation remove any render or debris from the existing wall.
Internal Walls
1. Plumb the lower connector against the existing wall so that it will be central to the new wall.
2. Mark the position of the fixing holes. Each connector should be fixed at three points, the first and last slot and in the centre. Ensuring that one fixing is at the point where the two connectors slot together and overlap. Fixings should be into brickwork and not mortar joints.
3. Drill and plug using an 8mm masonry drill bit and the plugs provided.
4. Fix the bottom two holes lightly using the stainless steel coach screws and washers.
5. Slot the upper connector into the lower one and repeat the above stages. The upper connector can be cut to length if required.
6. Tighten all fixings using a 10mm socket or box spanner.
7. Build wall in the conventional way with a full mortar joint between the existing and the new wall. Ties should be inserted at a maximum of 300 centres, every third brick course or each block course. Ensure that the ties and connectors are completely embedded with mortar.
Cavity Walls
Each leaf requires a separate starter system.
External Walls
Ensure that the bottom edge of the connector is above the damp-proof course. A weather seal of approximately 10mm should be created between the connector and the existing wall using a flexible mastic sealant or a compressible sealing strip. Consult your Local Authority, as additional weatherproofing may be required in accordance with local building regulations.